
So, I went wedding dress shopping with my sister over the
weekend. It was lots of fun…so much so, that I’m thinking I may just blow our
house deposit on a divorce and second wedding!
Anyway, wedding dress shopping inevitable leads to other
wedding-related discussions like bridesmaid dresses (thankfully my sister has
fabulous taste, so no fuchsia nightmares!!!) and yes, cake. Her fiancé wants
something super simple (a plain vanilla cake), whereas she wants something a
little more gourmet. Our discussion led us to thinking how she could
incorporate her fiance’s Argentinian heritage into the cake. She wanted a fancy
topper, however, it was going to be a little on the $$$ side. What could she
do? Then the answer came: dulche de leche.
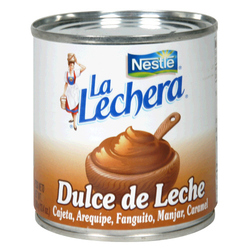
For those poor souls who are yet to experience the heaven
that is dulche de leche, it is essentially condensed milk, heated until the
sugar caramelises. Traditionally, it’s done on the stovetop in the can. Those
lucky enough to be living in the US can simply buy it off the shelf. Us poor
Aussies have one of three options: make it ourselves (and that’s NOT in the
spirit of my baking ethic!!), going to an Argentinian specialty shop and buying
a can (expensive and inconvenient) or using Nestle Caramel Top ‘n’ Fill. I’m
going to warn you now, it’s so delicious that you’d quite happily descend into
a diabetic coma eating the entire tin. And I’m also going to go out on a limb
and say that it’s even BETTER (yes, better!) than condensed milk. It’s like if
caramel and condensed milk had a baby.
 |
| Canned heaven |
 |
| Canned just-as-good heaven |
Anyway, enough about dulche de leche (I’m drooling now).
Well, not enough…I have to explain how it comes into the cake. The idea was a
rich vanilla cake with dulche de leche in between the layers. Not only simple,
but Argentinian. I took it one step further…what if the cake looked like a
giant alfajore? Alfajores (pronounced aff-a-HORE-eh) are magical butter biscuits with dulche de leche in
the middle, the sides rolled in coconut (or coated in chocolate or
icing…depends where in South America you come from). So, you can see how this
cake could be an alfajore wannabe. Simple vanilla icing on the top (cos it’s a
cake after all!)
 |
| Mmmmm....alfajores... |
How could I not accept this challenge? So, Saturday
afternoon I decided I’d have the cake ready for Sunday night dinner. But you have
a child, I hear you exclaim. How will you get it done? Well, here’s how I did
it.
Sunday morning, Destructor and I went to the shops at
8.30am. I grabbed two packs of vanilla butter cake, top ‘n’ fill and all the
other bits and pieces I needed for the week. By the time I got home, Destructor
was pretty tired and grumpy. He was walking like a drunk, but still wanted to
play, can you believe it? So, I put him to bed (much to his disgust) and into
the kitchen I went.
I used a Green’s Butter Cake mix for this adventure. I
know I rave about Aldi, but I really didn’t have the energy to battle Aldi with
a toddler! So, I got the best Woollies had to offer. To be honest, I was pretty
disappointed with their range, but that’s another story for another day. I
decided to bake two separate cakes, so I mixed the batches separately.
 |
| Double the price, but it'll have to do! |
Both cakes came out nice and golden brown, so I went
about levelling out one of them (to be the bottom cake). I then popped a whole
can of Top ‘n’ Fill in the microwave (in a bowl…not in the tin!!) for a little
bit just to smooth out the consistency. Then, I used the vast majority to fill
the cake. I may have eaten a little bit as well (I told you it was good!!). I
used the extra to go around the sides of the two cakes.
One thing that I found amazing was that my two cakes didn’t
match up exactly when I put them together. Baked in the same tin, they weren’t
the same size! I think it had something to do with cutting the top off the
bottom cake. Not sure. Will figure it out.
I then rolled the cakes in some shredded coconut,
pressing some on afterwards for good measure. To decorate the top, I thought I’d
try a technique I’ve seen all over Pinterest – covering it in piped roses. I
already know how to do roses, so how hard could it be?
For the icing, I used the packets that came with the
cakes. I had to add a bit more icing mixture and milk to get enough icing, but
no dramas there. And off I went. The roses looked super sweet! I had to pipe
some stars to cover the bits of naked cake peeking through, but that was fine.
I sprinkled some love hearts left over from the engagement cupcakes, plus some
glitter (cos who doesn’t like glitter) and voila – a cute cake full of magic!

The verdict: needed more Top ’n’ Fill. Pretty much
everybody said so. Mum (my baking hero) suggested cutting the top cake in half
and filling that as well. And maybe the bottom cake too. Love it! The butter
cake itself was a hit – beautifully light and fluffy, delicate flavour.
Come the end of the night, nobody wanted to take any
home! I had to laugh. None of us really need any calories, to be honest. Plus,
we all lack any kind of self-control when it comes to cake. Mum tried to
convince me that my husband could eat the remainder over three days…the look on
his face was priceless! So, it came home with me and I divided it up into four
pieces – one for hubby and one each for the IT guys at my work. IT guys always
deserve cake – they work hard!
No comments:
Post a Comment